


 sales1@lingtong-structures.com








How to Measure a ClearSpan Tent?
 Jun 30, 2025|
 View:632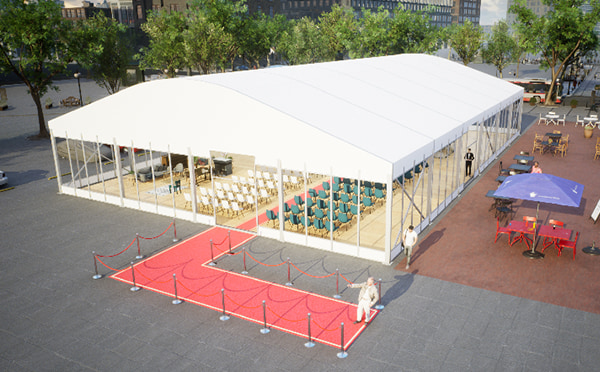
Choosing the right size ClearSpan tent is the crucial first step for successful event planning or temporary storage solutions. Whether sheltering a wedding celebration from the elements or providing temporary protection for industrial equipment, accurately measuring the coverage area of a clearspan tent is paramount. Incorrect size estimation can lead to installation failures, wasted space, or safety hazards. This guide will walk you through the professional steps to measure accurately, ensuring your clear span event tent perfectly fits the requirements.
I. Comprehensive Site Assessment: The Foundation of Measurement
Before pulling out the tape measure, thoroughly understanding your site is essential.
Terrain Inspection is Crucial: Carefully examine the area where you plan to install the clearspan tent. Is the ground level? Are there noticeable slopes, depressions, rocks, or tree roots? The ideal location for a clearspan event tent should be as level and firm as possible. Minor unevenness can be adjusted for, but significant terrain issues may require professional leveling or an alternative site.
Precise Boundary Definition: Clearly define the actual area the tent needs to cover. Consider what will be housed inside (tables, chairs, a stage, equipment, walkways). Always allow ample buffer space around the required area (typically 1-2 meters extra per side) for anchoring, guy ropes, and personnel movement, ensuring your clear span tent is both practical and safe.
Identify Overhead Obstacles: Vigilantly inspect the space directly above and surrounding the site. Are there tree branches, power lines, eaves, light poles, or other obstructions that could hinder tent installation or use? Remember to consider vertical space, not just ground area, ensuring the clearspan tent height allows for smooth installation and unimpeded operation.
II. Preparing Professional Tools: Ensuring Measurement Accuracy
The right tools make the job efficient and accurate.
Tape Measure is Core: Use a sufficiently long steel tape measure (ideally 30m or 50m) to measure the tent's length and width in one go, avoiding cumulative errors from segmented measurements. This is the most direct and reliable tool for measuring clearspan tent coverage.
Marking Locations is Essential: Use sturdy stakes, spray marking paint, or highly visible markers to clearly identify the four corner points of your measured tent area. These markers are vital references for verifying dimensions and guiding installation.
Reliable Recording Tools: Consistently record all measurements using a notebook, phone, or tablet. Clearly label each side's length (Length A, Length B, Width C, Width D) and sketch a simple site diagram. This is especially important for planning large clear span event tent layouts.
III. Core Measurement Steps: The Art of Length, Width, Height, and Diagonals
Following a systematic process is key to obtaining accurate data.
Step 1: Measure Length and Width
Define Primary Directions: Typically, the longer side is defined as the Length, the shorter side as the Width. Clear direction aids standardization.
Multi-Point Measurement for Accuracy: Measure along the planned tent base frame or skirt line. Never measure just once! Take measurements at the start, middle, and end of the length. Repeat for the width. Use the average of these measurements as the final Length (L) and Width (W). This compensates for minor ground irregularities.
Clear Recording: Record definitively: Length L = [Average] meters, Width W = [Average] meters. This is the foundational data for selecting your clearspan tent size.
Step 2: Verify Diagonals
Ensuring a Rectangle: For a standard rectangular tent, the two diagonal lengths must be equal. This is critical for verifying site regularity and measurement accuracy.
Cross Measurement: Stretch a long tape measure from one corner (e.g., NE corner) to its opposite corner (SW corner), record length (Diagonal D1). Repeat from another corner (NW corner) to its opposite corner (SE corner), record length (Diagonal D2).
Error Control: Compare D1 and D2. For a standard clear span event tent, the difference should be minimal (e.g., within a few centimeters). A significant difference (e.g., over 10-15 cm) indicates an irregular site or measurement error, necessitating re-inspection. This is crucial for ensuring smooth tent installation.
Step 3: Confirm Clear Height
Focus on Vertical Space: Measure from the ground to the lowest point of all potential overhead obstructions within and around the site. Pay special attention to wires, branches, under eaves, or light fixtures.
Allow Safety Margin: The peak height of your chosen clearspan tent must be significantly lower than this minimum clearance height. Strongly recommend reserving at least 1 meter of safety margin to account for natural sag during installation, dynamic movement in wind/rain, and ventilation needs.
IV. Key Considerations and Common Mistakes
Avoid pitfalls to ensure reliable results.
Ignoring Ground Slope: Measuring only the sloped distance (without ensuring the tape is level) on an incline will yield a longer value than the actual horizontal projection, leading to selecting an oversized clearspan tent. Always measure the horizontal projection, or use a laser distance measurer with a level function.
Insufficient Anchor Point Space: Focusing solely on fabric coverage often leads to forgetting the space needed for guy ropes or ballast systems outside the footprint. Always plan for adequate anchoring zones (typically 1-2 meters per side) around the required coverage area, ensuring it's obstacle-free – vital for stabilizing large clear span event tent structures.
Underestimating Obstacle Impact: Overlooking overhead obstacles while focusing on ground-level ones is common. Low-hanging wires, branches, or building protrusions can hinder installation and cause fabric damage in high winds, posing serious risks. Aerial obstacle checks must be meticulous.
Overlooking Future Needs: Are measurements based solely on current needs? Consider potential future expansion (e.g., adding connector tents) or layout changes. Building in some flexibility is often wise, preventing limitations for adjusting your clearspan tent setup later.
Measure Accurately, Choose Wisely, Trust Lingtong
Mastering the correct measurement of your clearspan tent site is fundamental to event success or efficient storage solutions. It directly impacts installation feasibility, structural safety, and how well the space meets your needs. From meticulous site assessment to standardized measurement of length, width, height, and diagonals, each step demands diligence. Always allow ample safety margins and double-check your data.
Once you have precise site dimensions, choosing an experienced and reliable clearspan tent manufacturer is critical. A professional manufacturer not only provides high-quality clearspan tent or clear span event tent options matching your size requirements but also offers expert installation guidance, safety-compliant anchoring solutions, and comprehensive after-sales support. This ensures your investment delivers value and your project proceeds flawlessly.
Choose Lingtong, Your Professional clearspan tent partner! With years of design and manufacturing expertise, we understand diverse site requirements deeply. We offer full-spectrum services, from precise size customization to professional installation support. Rely on our dependable quality and expert solutions to create a safe, perfect canopy for your next project. Contact the Lingtong team today for your customized ClearSpan tent solution!